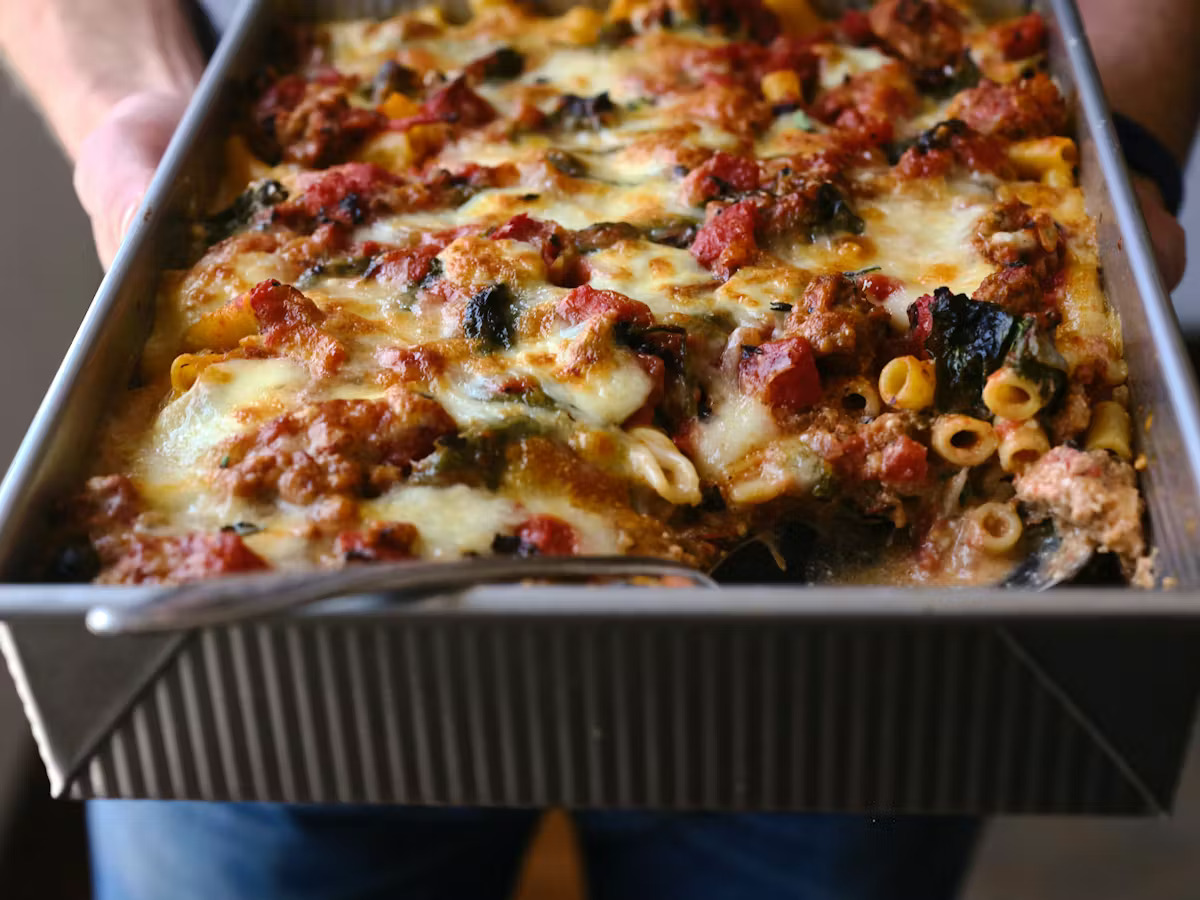
Baked Ziti
This baked ziti uses ricotta, mozzarella, and creme fraîche to make a bubbly, rich pasta with a hearty, spinach-flecked red sauce loaded with flavor. The creme fraîche keeps things silky, adds dimension, and is a game changer. A family favorite that freezes well and happily feeds a crowd.
I discovered a truly fantastic version of baked ziti in 2017 when I started cooking from Colu Henry’s Back Pocket Pasta. Big, hearty, family-style pastas are a great love of mine, but my baked ziti attempts were always just so-so. I struggled with overall cohesiveness, and the ricotta mixture always tended to bake up a little drier than I hoped. Colu’s technique was a game-changer. She recommends a 50/50 blend of ricotta and creme fraîche in her recipe - it keeps everything silky and rich, and I’ve never looked back. And yep, sour cream will also work in a pinch.
What Makes Great Baked Ziti?
If you want to make the best baked ziti, focus on two things: how long you cook the pasta, and nailing a great sauce. The sauce is king here. You want to use good, flavorful tomatoes, and you want to let everything simmer down into a thick, chunky, vibrant red sauce. A bit of patience is key. See the sauce in the photo below? Keep simmering. On the pasta front, avoid over-cooking in the initial stage, the boil. The ziti will continue cooking as the pasta bakes - you want to arrive at the finish line with perfect pasta. If you overcook during the initial boil, the pasta will become too soft and unstructured.
Baked Ziti: The Ingredients
- Dried ziti pasta: Use a good-quality dried pasta here. Ziti is the namesake shape to use, but penne is a legit alternative and easier to find tbh. For a bit of added nutrition, explore whole wheat pastas, or pasta made with lentils or chickpeas. As I’ve mentioned in previous pasta recipes, a forever favorite of mine is the Monograno Felicetti Farro Penne Rigate. You can even make baked ziti gluten-free by swapping in one of the GF pastas.
- Baby spinach: One note here, if your baby spinach has long thick stems, go ahead and snap the biggest offenders off. Aside from that I don’t bother chopping or fussing, but you can if you like.
- Canned tomatoes: Look for good-quality diced canned tomatoes. Note that you’ll need both a 28-ounce *and* a 14-ounce can. I tend to grab fire-roasted for this recipe, but you don’t have to!
- Sausage: I rarely buy or cook with fake meat, but this is one recipe where I use Impossible sausage for the meat component. It just helps check all the boxes for a big, family-style baked ziti that everyone can get on board with. Another alternative is to use this mushroom ragù as your sauce, in place of the red sauce with sausage posted below.
- Cheeses: Three cheese are in play here. Use fresh mozzarella if possible - it’ll typically be in liquid, and any size ball is fine - you’ll be tearing it into smaller pieces. For the grated cheese Colu recommends Pecorino Romano, but if you tend to keep Parmesan on hand, go ahead and use that - freshly grated. And the ricotta plays another key roll here, so use one you’d enjoy eating straight - on a cracker or slice of toast.
- Creme fraîche: The wildcard in this baked ziti is the addition of creme fraîche. To make your own, you can add 1 tablespoon of cultured buttermilk or yogurt to a cup of heavy cream. Stir well, cover with a clean dishtowel, and allow to sit out on your counter for 12 hours or so, until it thickens. Refrigerate until ready to use. Alternately, you can use sour cream here. It’s tangier, but in a good way!
Variations
Here are some favorite variations on this baked ziti that I’ve cooked over the years.
- Make it Spicy: To make this baked ziti feisty and spicy, add a bit of spicy Calabrian pepper paste (the one I buy most is called Bomba di Calabria) to the sauce after adding the spinach. Go easy, some of these pastes are wildly spicy. But also go stronger than you might otherwise because the sauce will be cut with all that dairy. Taste and adjust.
- Make it Gluten Free: You can make this recipe gluten-free by using GF pasta in place of traditional pasta. At the time I’m writing this the Impossible sausage is GF, but double check - in case you’re using another brand or their product changes.
- Baked Ziti with Mushrooms: I do a version of this baked ziti using this mushroom ragù, and it is equally fantastic. Basically, fill a 12-inch skillet to 1/2-inch or so below the rim, and stir in the 5 ounces or spinach. Then proceed with the recipe as written. Basically, don’t skimp on the amount of sauce you’re using.
- Toss in Some Wildcards: A lot of times when making baked ziti, I’ll toss ingredients in on a whim. Whatever I have at hand. A few of the more successful additions include the following: torn olives, lots of lemon or orange zest, extra spinach or herbs, deeply caramelized onions, goat cheese in place of half the mozzarella.
Baked Ziti: Make Ahead Tips
This recipe makes a large pan of baked ziti. We typically eat half and freeze half resulting in easy meals in the coming weeks. The best way I’ve found to freeze baked ziti is to start by refrigerating your baked ziti until it is very cold. This makes it easy to slice into precise, individual portions. Arrange the portions on a parchment-lined baking sheet and freeze until solid. Transfer to freezer bags for up to 6 weeks. Reheat, covered in foil, on a baking sheet (or in baking pan), in a 375F oven until bubbly and hot throughout.
Back Pocket Pasta & Colu
Colu’s archives are a gold-mine of low lift, fabulous meals. In the years since Back Pocket Pasta was published, she also wrote Colu Cooks: Easy Fancy Food. You need someone like Colu Henry in your life. When Back Pocket Pasta was published, I wrote, "She's one of those stylish friends who will tell you where to score the prettiest dresses, help you book the best travel destinations, and happily point you toward your next good read." She’s the queen of bringing effortless style to the weeknight dinner table and her books are brimming with casual recipes achievable with little more than a reasonably stocked pantry and a bit of seasonal flair. You can follow her here and here.